




 WALK)
 TALK)
 SYNC)
 GUIDE)
Highlight Editing
Turn a historical place or event into a story people can explore. Edit the highlight's opening view, build a sequence of steps, and add layers, markers, and buttons that invite visitors to WALK through the setting or TALK with its people.
Getting Started
A highlight is a curated starting point in Running Reality. It has a title, description, thumbnail, and opening place and date. Detailed steps guide visitors through a narrative, while layers and markers add things to investigate around the highlighted location.
- Open Highlights in Projects and sign in with an account that has highlight editing access. Select an existing highlight, or use Add Highlight to begin a new one.
- Set the title, description, image, and starting view, then build the story in Detailed Steps. Expand Layers or Markers when you need extra features.
- Use Open Visitor View to test the experience, then arrange publication when it is ready.
Choose Save in each editing dialog to keep its changes. Controls such as reordering, copying or clearing a location, and toggling the WALK button save their changes directly.
Access and Publication
Creating and editing highlights requires the highlighter role. Editing controls are available while a highlight is in Draft; published highlights are read-only. Publication changes require an administrator. If a highlight is already published, ask an administrator to return it to Draft before you edit it, and arrange a review before publishing it again.
If controls are missing or disabled, check your sign-in, role, and the highlight's publication state. Learn about account roles or contact the team about highlight editing access.
Title, Description, Image, and Starting View
The controls above the steps describe the highlight as a whole. The opening view should establish the historical setting before visitors move through the detailed steps.
| Control or setting | How to use it |
|---|---|
| Edit Description | Set the title, a short description, and metadata hashtags. Include the # and separate tags with spaces. The title, description, and tags help visitors find the highlight. Reuse relevant tags already in use. |
| Edit Location | Set the highlight's starting date, latitude, longitude, and zoom. This is the opening view; individual steps can move to other places and times. |
| Edit Image | Upload a square image at least 500 × 500 pixels. The image is used for the highlight thumbnail and sharing. Keep the important detail near the center so it can crop well at different aspect ratios. |
| Open Visitor View | Open the highlight in a separate tab to see the visitor experience. Use this for testing; location links are intentionally inactive in the step editor. |
| Publish / Published | An administrator can publish the highlight or return it to Draft. Published highlights are read-only in the editor. Arrange a return to Draft before revising a published highlight. |
How Steps Work
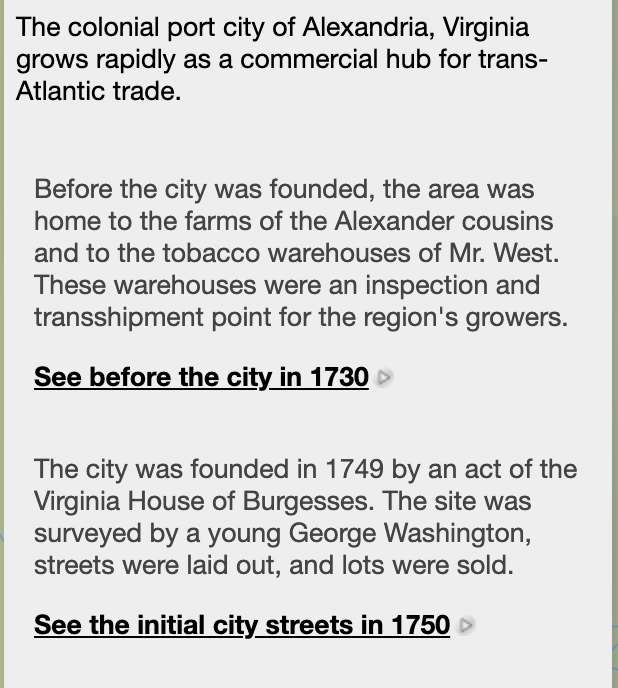
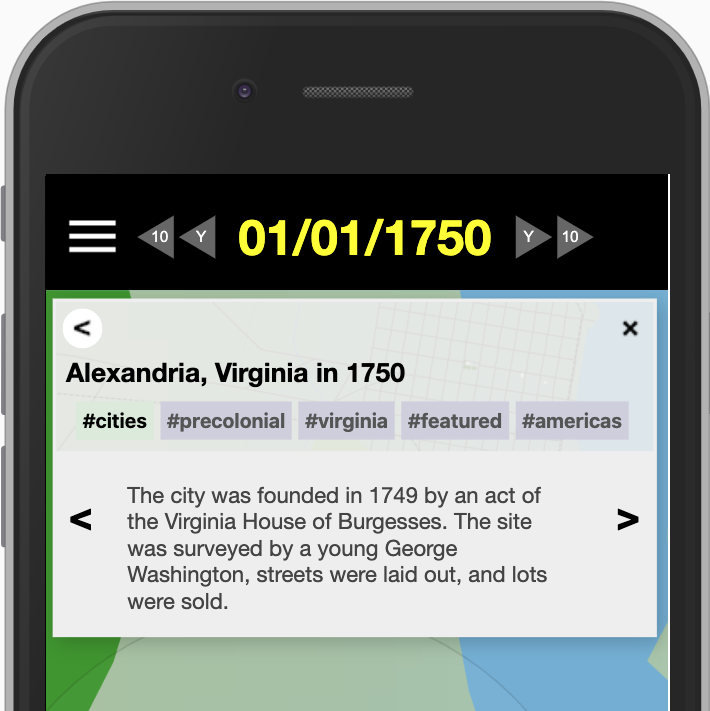
A step combines explanatory text with an optional date and location. A sequence can follow an event through time, move between places, or pause at one view for a closer explanation. Each saved location includes its date, latitude, longitude, and zoom.
On larger screens, visitors see steps down the sidebar with location links. On mobile screens, they see one step at a time and move forward or backward through the sequence. Keep each stop understandable on a phone as well as a desktop.
Editing Steps
Select a step in Detailed Steps to enable its editing controls. The panel shows the text, optional image, saved location, and optional location label for each step.
| Control or setting | How to use it |
|---|---|
| Add Step | Create a new step at the end of the sequence. Enter its text and choose Save. Use Move Up or Move Down to put it in the right position. |
| Remove Step | Delete the selected step. There is no undo control, so check the selection before removing it. |
| Edit Text | Edit the selected step's explanation. Plain text and Markdown are supported for headings, lists, emphasis, links, and bibliographies. Keep paragraphs short for mobile readers; the editor recommends splitting text longer than about 400 characters into multiple paragraphs. |
| Edit Image | Attach or change the selected step's image. This is separate from the highlight's main thumbnail. |
| Edit Location | Set the step's date, latitude, longitude, and zoom with the mini-map or by typing values. Save the view that best explains this part of the story. |
| Copy Location | Copy the most recent earlier step location into the selected step. This is useful when the next stop changes only the date or zoom. For the first step, the starting view provides the reference. |
| Clear Location | Remove the selected step's location change. The step still shows its text, while the view stays where the visitor was already looking. |
| Edit Location Label | Give the location link a short, clear label, such as “See the shoreline in 1903.” Keep essential directions in the main text, because mobile layouts may omit this label. |
| Edit Action | Add a custom link button; see step buttons below. |
| Show WALK Button / Show TALK Button | Add ground-level exploration or conversations to the selected step; see step buttons below. |
| Move Up / Move Down | Move the selected step earlier or later in the narrative. Recheck the sequence and location changes after reordering. |
WALK, TALK, and Other Step Buttons
Step buttons give visitors an action to take at a particular point in the story. Select the step first, then use the relevant control.
Show WALK Button
Choose Show WALK Button to add a WALK button to the selected step. This control toggles the button on or off and saves immediately; choose it again to remove the button.
WALK opens ground-level exploration using the step's saved location, or the current view when the step has no location. Visitors on location can explore in augmented reality; remote visitors can explore the historical scene in virtual reality. Read the WALK guide.
Show TALK Button
- Select the step and choose Show TALK Button to open Edit Talk Buttons.
- Enter one person's name per field. Use Add Name for additional people; each saved name creates its own TALK button. You can also use a supported object type, such as Infantry, to identify a nearby historical person or unit.
- Choose names associated with the step's place and date, near the center of its view, and explain who they are in the step text. The names select existing historical content in that setting.
- Choose Save, then test each TALK button in the visitor view. To remove a button, clear its name and save. Clear all names to remove the step's TALK buttons.
Read about interactive people and their sources.
Edit Action
Use Edit Action to add a custom button with Button Text and a URL,
then choose Save. For example, the last step could link to a source collection,
a visitor information page, or a class activity. Use a full https:// URL
or a Running Reality path beginning with /, and test the destination.
Adding Layers
A layer places additional geographic information over the historical map for the duration of the highlight. You might use one to show a route, boundary, battle line, archaeological plan, or another set of features that visitors should compare with the people and events in Running Reality. Open the Layers panel to add a layer or manage the layers already associated with the highlight.
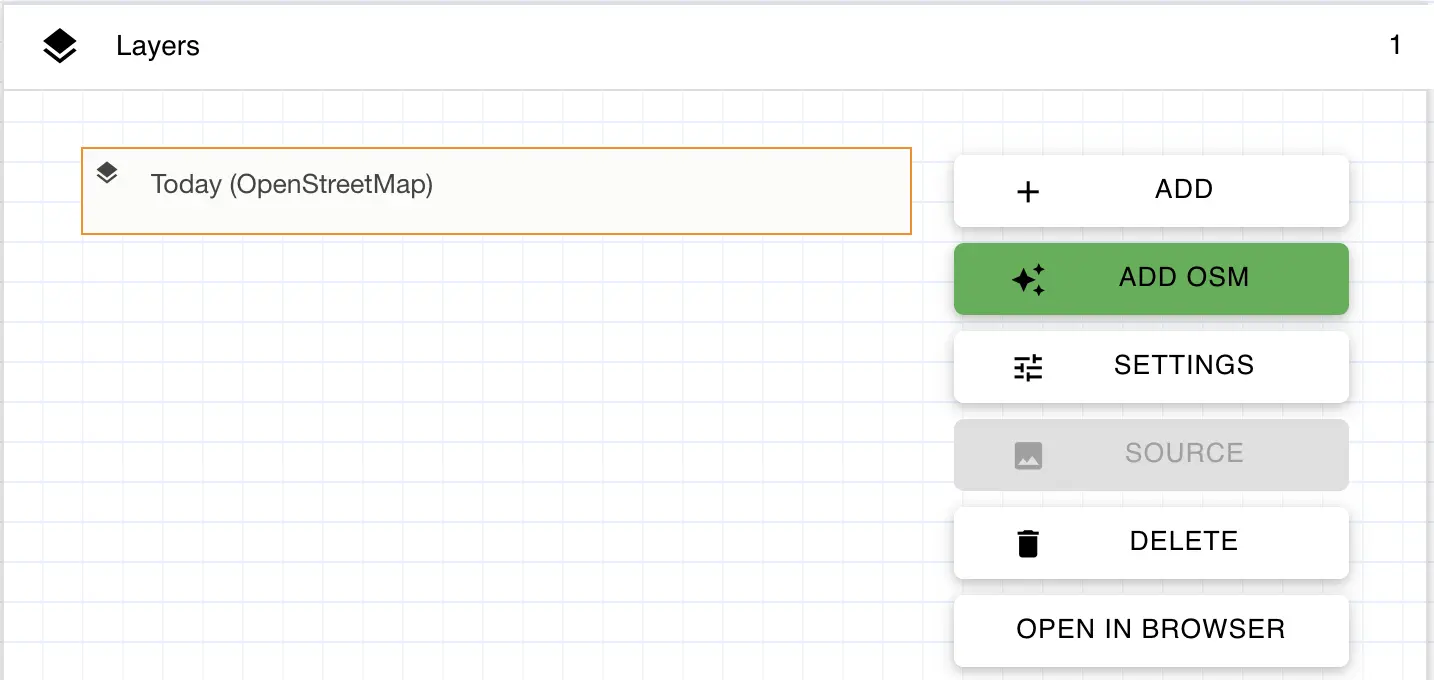
| Control or setting | How to use it |
|---|---|
| ADD | Create a layer that uses a GeoJSON file. After saving the layer's settings, select it and use SOURCE to upload the file or link to one hosted elsewhere. |
| ADD OSM | Add a present-day OpenStreetMap layer. This shortcut is useful for comparing the historical landscape with the same place today. |
| SETTINGS | Edit the selected layer's label, appearance, visibility, and the controls available to visitors. |
| SOURCE | Upload, select, or link to the GeoJSON file displayed by the selected layer. OpenStreetMap layers use their built-in source instead. |
| DELETE | Remove the selected layer from the highlight. |
| OPEN IN BROWSER | Preview the selected layer on the Running Reality map in a separate browser tab. |
Select ADD or select an existing layer and choose SETTINGS to configure how the layer appears to visitors.
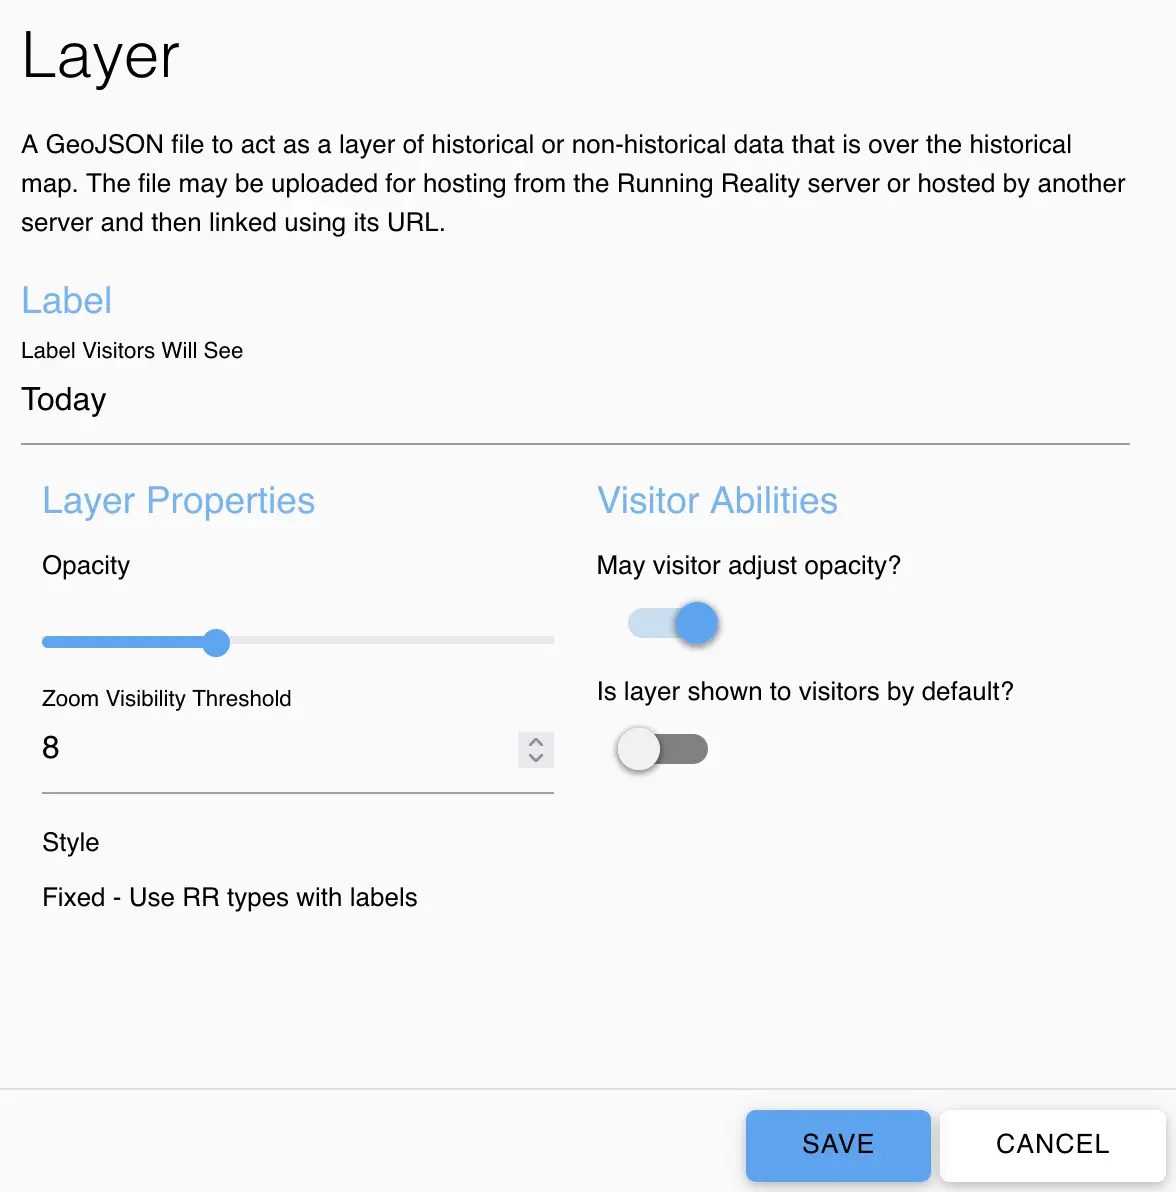
| Control or setting | How to use it |
|---|---|
| Label | Set the name visitors see for the layer in the map's layer controls. |
| Opacity | Control how strongly the layer is drawn over the historical map. |
| Zoom Visibility Threshold | Keep the layer's features hidden until the map is zoomed in to the selected level. |
| Style | Layers currently use the fixed Running Reality style for GeoJSON features, including labels for supported feature types. OpenStreetMap uses its built-in map appearance. |
| May visitor adjust opacity? | Allow visitors to fade the layer in and out so they can compare it with the historical map. |
| Is layer shown to visitors by default? | Show the layer when the highlight first opens. When this is off, visitors can still turn it on with the layer controls. |
If you export a standalone map and host it on your own website, the exported HTML can include the raw layer data. You can also edit that page to add or remove layers, change their styles, or control them directly with JavaScript through the included OpenLayers map. See the embedding guide for these more advanced options.
Adding Markers
A marker is a highlight-specific pin that calls attention to an important location. Markers can identify a building, landscape feature, event location, or evidence station that visitors should investigate, and they appear only while the parent highlight is being shown. Visitors can open a marker by selecting it on the map or, when geofencing is enabled, by approaching its physical location during an on-site activity.
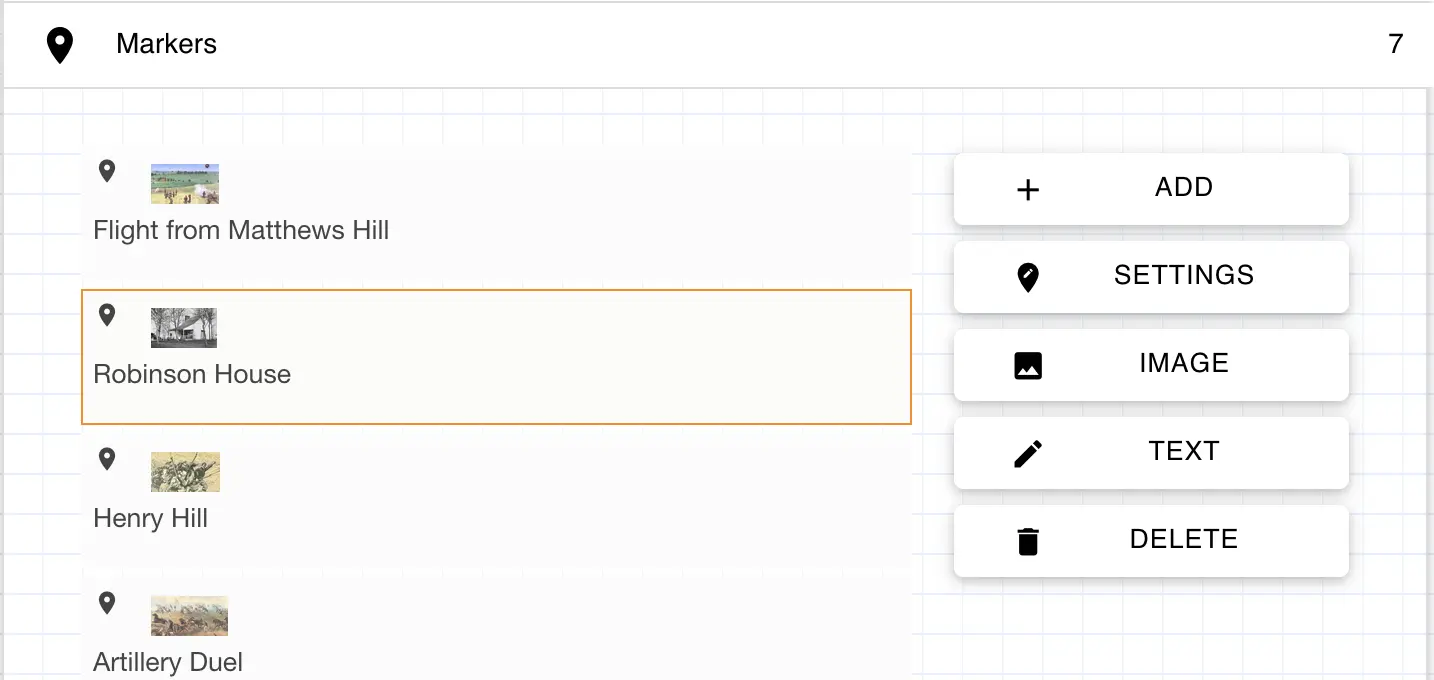
| Control or setting | How to use it |
|---|---|
| ADD | Create a marker and set its label, location, visibility, and geofence behavior. |
| SETTINGS | Edit the selected marker's label, location, visibility, and geofence behavior. |
| IMAGE | Attach the image visitors see when they open the selected marker. |
| TEXT | Add the explanation, directions, or evidence visitors see when they open the selected marker. |
| DELETE | Remove the selected marker from the highlight. |
Select ADD or select an existing marker and choose SETTINGS to configure where and when the marker appears.
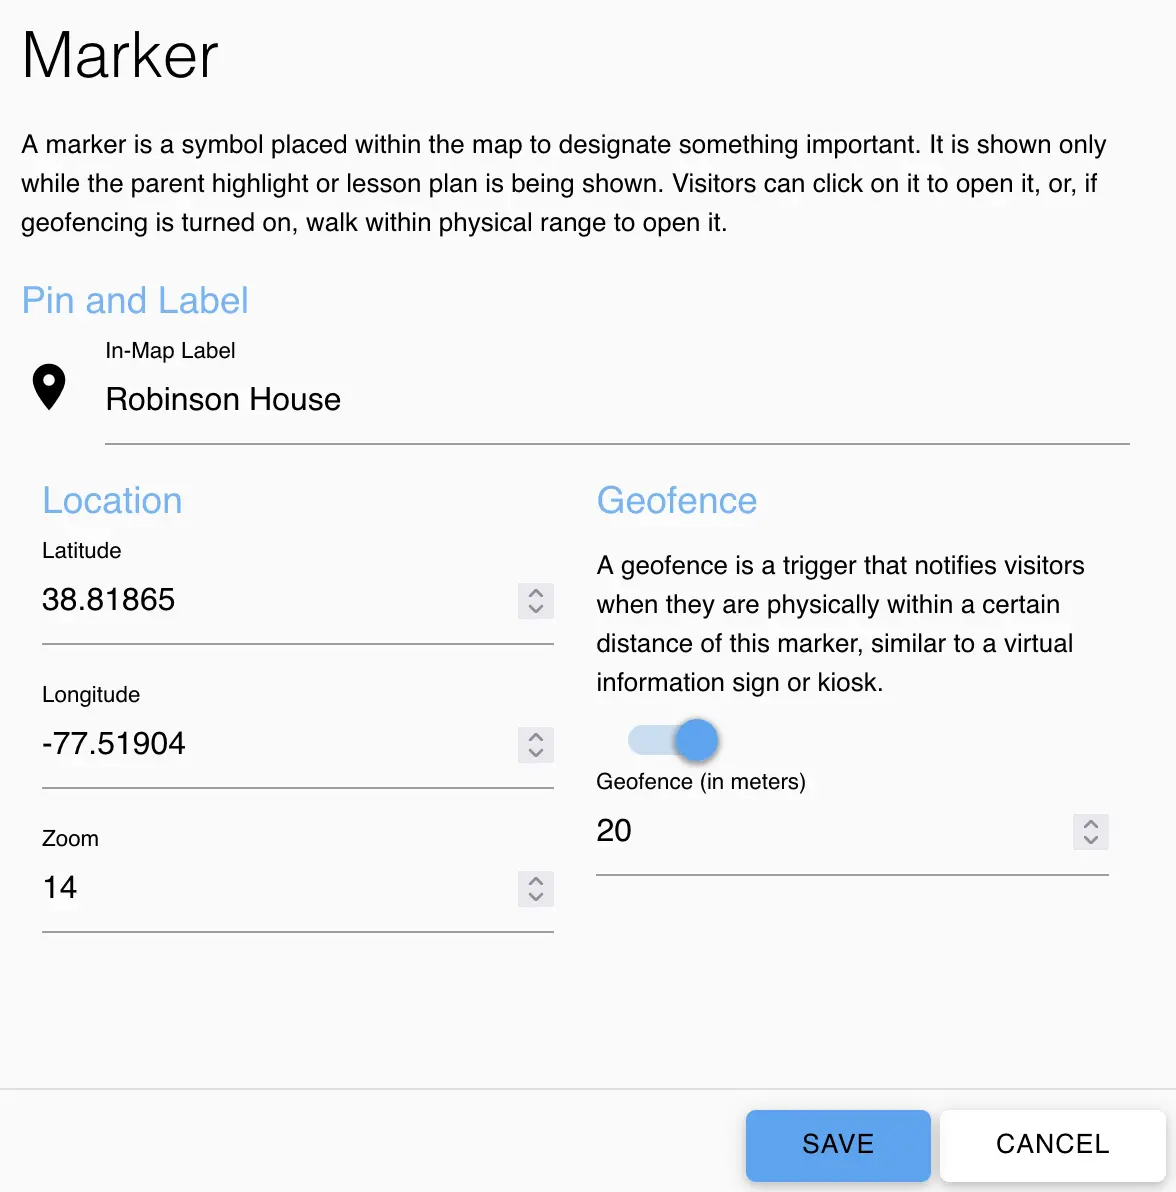
| Control or setting | How to use it |
|---|---|
| In-Map Label | Set the short name displayed beside the marker pin. |
| Latitude / Longitude | Place the marker at its geographic location on the map. |
| Zoom | Choose how far visitors must zoom in before the marker appears. |
| Geofence | Turn on location-based notification for an on-site activity. When enabled, the marker can work like a virtual information sign or kiosk while the highlight is open. |
| Geofence (in meters) | Set the physical radius around the marker that triggers the notification on a visitor's device. The editor limits this value to between 1 and 500 meters. |
Geofenced Markers
A geofence uses the visitor's real device location to trigger a marker when they approach it. Changing a step's historical date or location is different from physically entering a geofence.
- Expand Markers, add a marker or select one and choose Settings.
- Enter the marker's latitude and longitude, a useful label, and its zoom threshold.
- Turn on Geofence and enter a radius in Geofence (in meters). Choose Save, then add the marker's Image and Text.
- Open the highlight on a phone at the real location, allow location access, and approach the marker to test its trigger. Adjust the radius for the space and the device's location accuracy. With geofencing off, visitors can still select the marker.
Geofencing works while the highlight is open and device location is available. Test the full route on location: GPS readings vary, especially near buildings and trees. Keep the marker text useful for someone who opens it manually as well.
Previewing and Sharing
- Use Open Visitor View to check the opening date and location, read each step, and follow the sequence on both a large screen and a phone.
- Test images, location labels, custom links, and every WALK or TALK button. Check layers at their zoom thresholds and try the visitor's opacity controls.
- Open markers manually, then test geofenced markers on location. Confirm that the highlight shows the intended content for its selected dates.
- Arrange publication with an administrator, then share the highlight URL or QR
code from the editor's sharing panel. A link such as
/?highlight=222chooses the story to open.
For sponsored visitors, combine the highlight with the visitor access key using the Visitor Quick Start. For a class, use the Teacher Quick Start and SYNC guide. The highlight provides the narrative; visitor access and class synchronization are managed separately.
Historical Detail and Evidence
A highlight interprets the historical world; it does not add missing buildings, people, or events just by mentioning them in a step. Check the available detail at each place and date, and connect explanations to cited sources.
Use Running Reality as a secondary source for context, then follow the evidence to the underlying works. To add or correct historical content, see Editing History, the Editing Style Guide, and the approach to 3D reconstruction.
Need help with a highlight? Email the Running Reality team.